An interesting game two nights ago where I used my Marines and Andrew his Tau, and both armies had a fair amount of air assault ability.
My Marine army was what is known in Epic jargon as an "air assault list", meaning its main punch is either teleporting Terminators (3 formations) or Thunderhawk air assault (3 formations), or Drop Podding formations (0 formations this time). It's expensive, elite, and something that I personally have rarely been able to get to work well, despite it having a fearsome reputation. Thus I wanted to give it some practice. :)
4000 POINTS
Codex Astartes (NetEA Tournament Pack 2014)
==============================
TERMINATOR [400]
4 Terminators, Captain
TERMINATOR [350]
4 Terminators
TERMINATOR [400]
4 Terminators, Chaplain
THUNDERHAWK [200] (Carrying 2x Assault Formations)
ASSAULT [225]
4 Assault Units, Chaplain
ASSAULT [225]
4 Assault Units, Chaplain
TACTICAL [475]
6 Tacticals, Supreme Commander, Razorback, Hunter
SCOUT [150]
4 Scouts
SCOUT [150]
4 Scouts
TACTICAL [375]
6 Tacticals, Razorback, Hunter
WHIRLWIND [300]
4 Whirlwinds
WHIRLWIND [300]
4 Whirlwinds
THUNDERHAWK [200] (Carrying 1x Deavastator Formation)
DEVASTATOR [250]
4 Devastators

Andrew Used a Tau list with 4 formations of Tigershark gunships carrying drones, plus super heavy tanks, more tanks, and recon.
| 425 | Armoured Cadre, 6 Hammerhead Railgun + Command Node, Skyray | |
| 425 | Mechanised Cadre, 2 Hammerhead Fusion, Skyray | |
| 4 Fire Warrior + Ethereal, 2 Devilfish + Command Node | ||
| 375 | Mechanised Cadre, 2 Hammerhead Fusion, Skyray | |
| 4 Fire Warrior, 2 Devilfish + Command Node | ||
| 475 | 2 Scorpionfish + Command Node + Commander | |
| 425 | 2 Scorpionfish + Command Node | |
| 150 | Recon Group, 3 Tetra, 2 Piranha TX-42 | |
| 150 | Recon Group, 3 Tetra, 2 Piranha TX-42 | |
| 150 | Recon Group, 3 Tetra, 2 Piranha TX-42 | |
| 175 | 4 Sentry Drone Turrets | |
| 175 | 2 Tigersharks | |
| 100 | 6 Gun Drones | |
| 175 | 2 Tigersharks | |
| 100 | 6 Gun Drones | |
| 175 | 2 Tigersharks | |
| 100 | 6 Gun Drones | |
| 175 | 2 Tigersharks | |
| 100 | 6 Gun Drones | |
| 150 | 2 Barracudas |

I also decided to use the random terrain generators in the old Epic 40000 Battles Book (3rd edition Epic). These were a pretty cool feature and work fine for Epic. I rolled up an Agri-world. Differences to normal Epic Armageddon terrain are that the dinosaurs on a patch of ground represent a "Herd". This counts as dangerous terrain for all units except war engines, and has no other effect! Also the woods are "plantations" in this game, which because the trees are planted in more orderly fashion they do not cause a dangerous terrain check for vehicles (something I promptly forgot about though it would have been useful to remember!)

Turn 1
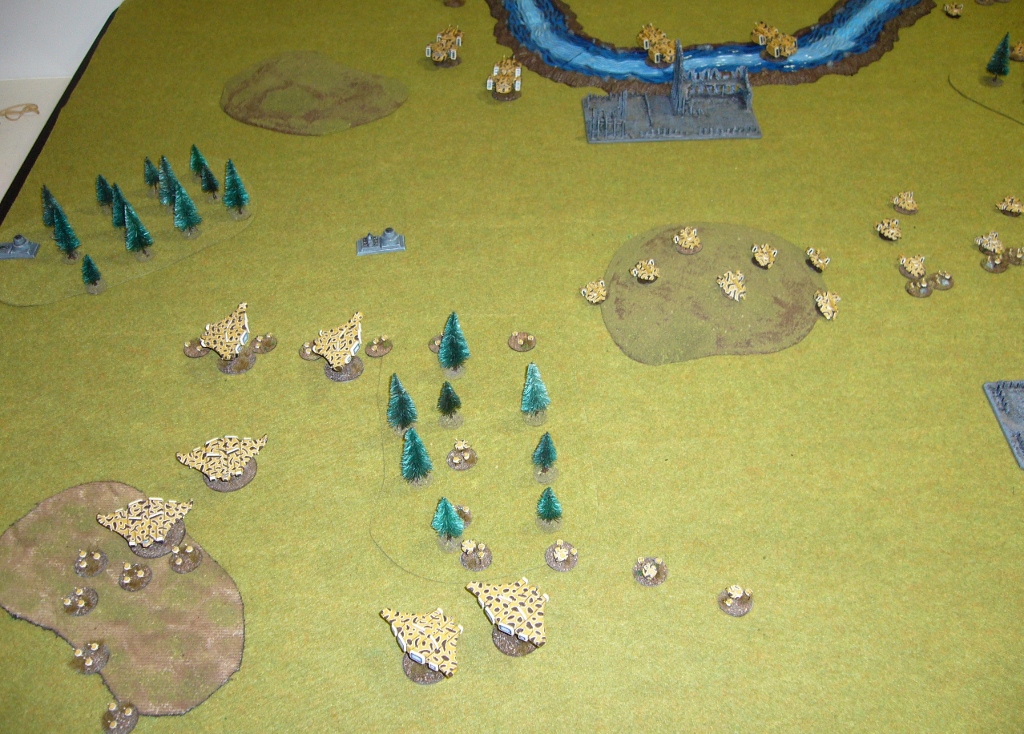
Here's the setup. As the Marines I chose deployment and ended up giving the skimmer heavy Tau quite a nice defensive deployment area behind a river. I figured I didn't want this in my deployment zone as it is impassable to vehicles except at one point near the ruins, and the problems it would cause me would exceed the benefit it would give the Tau by having it - maybe! The river is impassable to vehicles (though not all the Tau vehicles which are skimmers), and dangerous terrain for infantry.
The two Tau Take and Hold objectives are closest to the camera, near my main deployment area. The two Marine Take and Hold objectives are mirrored on the other side of the battlefield away from the camera.
The Tau excel at long range fire, so somehow I'm going to have to close and destroy them before they shoot me to pieces. And at the same time if I mess up the assault my assault troops will be gunned down very quickly.

I have a defensive position near one of the plantations, with both formations of Whirlwinds protected by a Tactical and Scout formation.

My Scouts on my left flank are aiming to distract and slow the Tau and draw their forces that way.

The Tau deployment making full use of the river.

And keeping out of the territory of the dinosaur herd...

Marines win Strategy Roll and I make the Tau move first. They advance a Recon formation to spot for the Scorpionfish tanks, but the Recon kills the Scout squad in range and so the Scorpionfish have to move and fire directly. Oops. Andrew isn't happy with this opening error on his part. My Tactical formation moves up and eliminates the Recon formation in a firefight.

Scorpionfish fail to kill any scouts to add insult to the error...

Tau Tigersharks and Drones descend upon my left flank wiping out my Scouts and also destroying a reinforcing Devastator formation that had just wiped out another Recon formation.
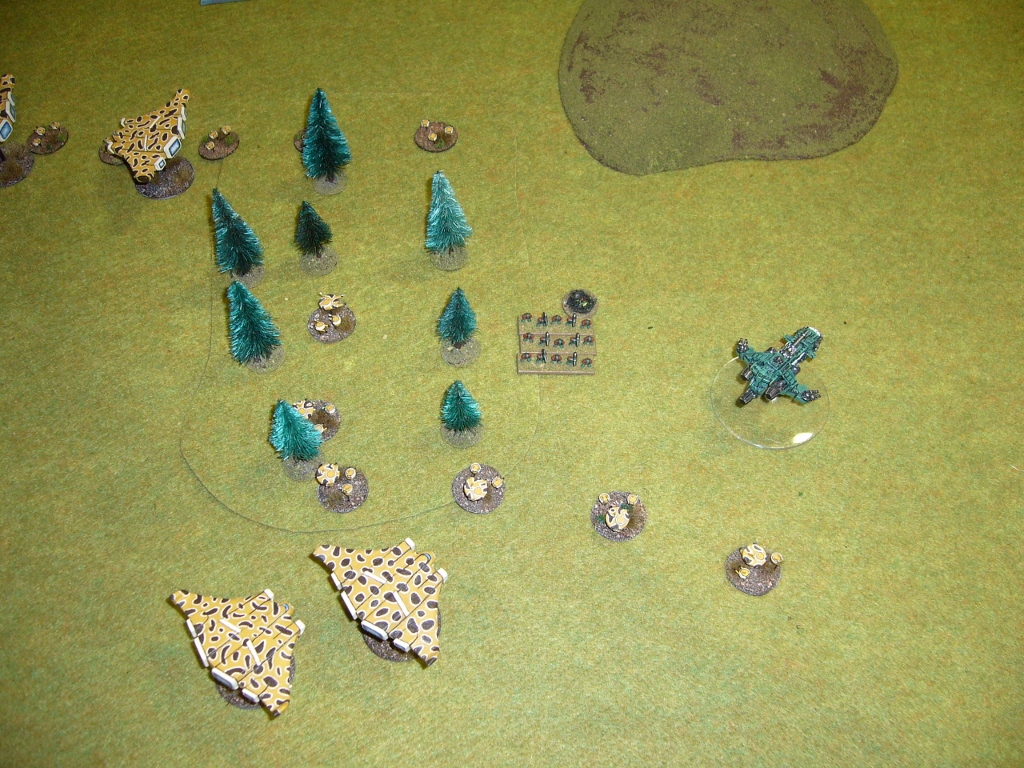
Tau advance strongly on the left, and their Hammerhead Tanks destroy the landed Thunderhawk.

Tau make their point and take the left side of the board decisively. I decline to fly on with my second Thunderhawk given all the AA and waiting interceptors.
The Tau have spread out though, and as turn two approaches I now have some potential targets...

Turn 2
I teleport all three Terminator formations near the two Scorpionfish formations. The Captain's formation takes two blastmarkers and the Chaplain's formation one blastmarker.
This is quite a risky move, as I will be relying on firefight with Terminators rather than close assault given the Tau vehicles are skimmers. I'm also going in disordered against well armoured skimmers (5+ deflector and 5+ reinforced armour). Fortunately the Tau only have a firefight of 6+.

First assault is two formations (one the Captain ordering the combined assault), supported by the third formation. It goes in my favour and the Tau formation is wiped out. I retain initiative and the Chaplains formation follows up with another firefight engagement against the second Scorpionfish formation. Support is provided by the other two Terminator formations which have consolidated into support range after the first firefight.

Another victory and all Scorpionfish and the Tau Supreme Commander are eliminated for loss of no Terminators! Pretty devastating for the Tau.

Tau Hammerheads respond, and wipe out all the vehicles from my Supreme Commanders Formation. Then Tau aim for revenge on my Terminators throwing formation after formation of fire at them. Fortunately the Terminators have Thick Rear Armour ability so the usual Tau crossfire trick doesn't help them. Still weight of fire takes its toll and soon Terminators begin to fall.

My Whirlwinds keep firing barrages at Tau formations keeping up attrition on them.

Time for another air assault, here comes the Thunderhawk with Assault Marines, flying through heavy flak and dodging interceptors to emerge unscathed.

The Assault marines destroy all but one Hammerhead with their engage action, with the two Chaplains Inspiring ability urging them on. Two Assault Squads are lost.

Terminators continue to take much fire and two formations are broken by now.


One formation of Terminators is wiped out, and the other two are broken.

End of turn before rallying.


After rallying, all Marine formations rally, though not all Tau.

Turn 3
Tau win Strategy Roll, but fail to activate with their Firewarriors who just carry out a shoot action. This is still enough to wipe out the two remaining stands of one Assault formation though.

My Thunderhawk flies on and strafes and breaks a gun drone formation, before the Tau interceptors get a chance to do anything.

And my second Assault Marine formation engages and destroys the Firewarrior formation for no loss.


The Tau break one of the rallied Terminator formations and concentrate on the second one.

My Terminators engage and destroy a gun drone formation before they are broken in turn.

But the Tau are out of activations except for Bombers and Fighters, and on my right flank my Marine units which had been hunkered down in cover, now surge forward and claim the Tau Take and Hold objectives. The Tau cannot stop them all.

Tau hold my Take and Hold objectives on the other flank.

Game over. Win to Marines 2-1 on Victory Conditions, with Take and Hold and Break Their Spirit (the Scorpionfish formation destroyed), to Take and Hold Victory Condition for the Tau.

Conclusion
Well I didn't like my chances at the start of the game, but the Emperor smiled upon the forces of righteousness. The plan worked, which was to hit some priority targets hard with assault troops, and then let the Tau exhaust themselves on two Marine hard points - the Terminators and defences around the Whirlwind artillery park. I was relying on Marine armour and rallying ability to outlast the Tau in a battle of attrition once the main Tau power units were weakened/destroyed, and that's how it panned out. However, had the Terminators lost their engage action it would have been a different story. It would have been preferable to suppress the Scorpionfish first of course but in this instance I didn't have time and things were balanced too finely so I felt I had to take the risk!
As usual an interesting tactical challenge, and also as usual very different in nature to that of any other recent game given the diversity of forces you can field in Epic!
As usual an interesting tactical challenge, and also as usual very different in nature to that of any other recent game given the diversity of forces you can field in Epic!


